• chevron_right

      System76’s updated 15-inch Pangolin laptop ships with Ryzen 7 5700U CPU

      Jim Salter · news.movim.eu / ArsTechnica · Wednesday, 1 September, 2021 - 19:30 · 1 minute

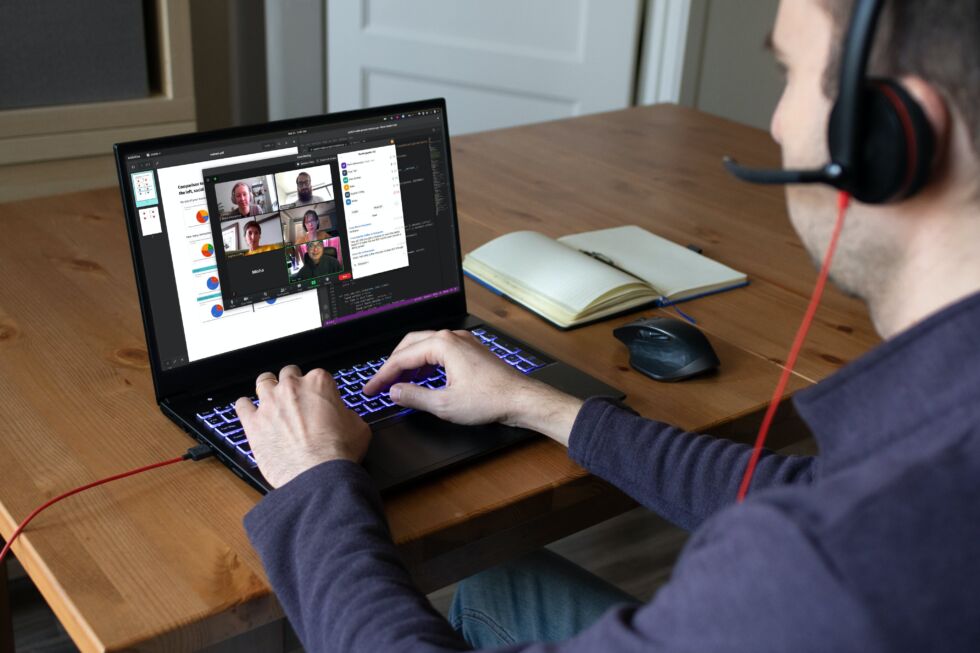
    hero shot

    Enlarge / System76's Pangolin is a lightweight and relatively slender 15" design with a 1080p matte display and RGB-lit keyboard. (credit: System76 )

    Specs at a glance: System76 Pangolin
    OS Pop!_OS 21.04 or Ubuntu Linux 20.04
    CPU Ryzen 5 5500U or Ryzen 7 5700U
    RAM 8GiB DDR4 (upgradable 60 64GiB)
    GPU AMD Vega 7 integrated
    SSD 240GB to 2TB NVMe
    Battery 49 Wh LiOn
    Wi-Fi Intel dual-band Wi-Fi 6
    Display 15-inch 1080p matte
    Camera 720p
    Connectivity
    • two USB-A 2.0 port
    • one USB-A 3.2 port
    • one USB-C 3.2 port
    • one gigabit Ethernet port
    • 3.5 mm phone/mic combo jack
    • DC power jack
    • full-size HDMI 2.0 out
    • Kensington lock slot
    Entry-level price $1,200 (Ryzen 5500U, 8GiB RAM, 240GB NVMe)

    This week, System76—probably the best-known Linux-only laptop vendor— announced the latest update to its lightweight 15-inch Pangolin laptop series. The newest models of Pangolin are available and shipping today; customers have a choice between a six-core Ryzen 5 5500U and an eight-core Ryzen 7 5700U processor.

    Pangolin was already the first System76 laptop model to offer AMD Ryzen processors, with last-generation Ryzen 4500U and 4700U models announced last December . This year's model bumps up both the processor generation and asking price significantly—last year's Ryzen 4500U Pangolin started at $850, offering 8GiB of RAM and a 240GiB SSD in the entry-level trim. The new 5500U-powered Pangolin runs $1,200 for the same specs.

    AMD Ryzen + Linux for the win

    The increase in price likely reflects additional public awareness of mobile Ryzen's outstanding Linux kernel support as well as its significant raw performance advantage over most competing Intel CPUs. Although we didn't get the chance to test System76's Ryzen 7 4700U, Acer's 4700U-powered Swift 3—which isn't even designed as an OEM Linux laptop—remains one of our all-time favorite systems for dedicated Linux users.

    Read 4 remaining paragraphs | Comments

    index?i=Wa1LI6EhEcA:AZmxiwHAG-g:V_sGLiPBpWUindex?i=Wa1LI6EhEcA:AZmxiwHAG-g:F7zBnMyn0Loindex?d=qj6IDK7rITsindex?d=yIl2AUoC8zA
    • chevron_right

      Linux/BSD Command Line 101: Using awk, sed, and grep in the Terminal

      Jim Salter · news.movim.eu / ArsTechnica · Monday, 30 August, 2021 - 11:15

    IT programmer as genius or wizard sitting behind computer.

    Enlarge (credit: jozefmicic via Getty Images )

    As a relatively isolated junior sysadmin, I remember seeing answers on Experts Exchange and later Stack Exchange that baffled me. Authors and commenters might chain 10 commands together with pipes and angle brackets—something I never did in day-to-day system administration. Honestly, I doubted the real-world value of that. Surely, this was just an exercise in e-braggadocio, right?

    Trying to read the man pages for the utilities most frequently seen in these extended command chains didn't make them seem more approachable, either. For example, the sed man page weighs in at around 1,800 words alone without ever really explaining how regular expressions work or the most common uses of sed itself.

    If you find yourself in the same boat, grab a beverage and buckle in. Instead of giving you encyclopedic listings of every possible argument and use case for each of these ubiquitous commands, we're going to teach you how to think about them—and how to easily, productively incorporate them in your own daily command-line use.

    Read 30 remaining paragraphs | Comments

    index?i=Wta5Bjobr_0:dt4LdTJdYTU:V_sGLiPBpWUindex?i=Wta5Bjobr_0:dt4LdTJdYTU:F7zBnMyn0Loindex?d=qj6IDK7rITsindex?d=yIl2AUoC8zA
    • chevron_right

      Donate a Linux PC.

      news.movim.eu / open-source-software · Saturday, 13 February, 2021 - 12:18 · 2 minutes

    Linux, or should I say GNU/Linux, comes in a variety of flavors called distros. We know that but people on a proprietary OS don't. Those people in general think that Linux, like their own OS, is a monolithic operating system but that contrary to their own OS is difficult, user unfriendly and something where you need to type into a terminal all the time.

    On top of that I discovered that the concept of distros is very hard to grasp for non-Linux users while I find this one of the strongest benefits of Linux. I currently use MX Linux on my Desktop PC and had Ubuntu MATE installed before that. On my (low-end) laptop I use either Antix or Puppy Linux. One of my sons uses Ubuntu on his desktop and my father uses Linux Mint on his laptop. All these flavors have their strengths that benefit the specific needs of a user and the hardware that they use.

    It's a pity that being able to choose a distro and tailor it to specific needs is so unknown to the non-Linux user. At the same time this is very understandable. Some people here will hate this but from a marketing perspective this variety of flavors is a weakness. It dilutes the Linux 'brand' and the complexity that comes with choosing a distro is too overwhelming for most users. This on top of the perception that Linux is 'difficult' and that most PC's come with a proprietary OS installed makes the case for Linux on the desktop almost impossible.

    The only way to increase market share is to exploit the biggest weakness of the Windows operating system. At some point in time almost every single user of Windows I know starts complaining how slow the PC has become. Solutions work only temporary and I'm afraid that most users ditch their PC and buy a new one. In fact a major reseller where I live uses this in commercials on national television to sell new PC's (with Windows of course). Think about all these laptops and desktop PC's that end as e-waste just because Windows made them slow. And this while the solution is simple and free, just install Linux.

    My proposal may be somewhat naif. Buy a second hand PC from a thrift shop (you'll be surprised how cheap these are) install Linux on it and donate it to someone that needs a PC. In my experience, once people start working with a modern Linux on a PC they hardly need any help. Hell, a lot of people don't use anything beyond the web browser so no worries about becoming a permanent help desk.

    #linux

    • wifi_tethering open_in_new

      This post is public

      mov.im

    • favorite

      3 Like

      tallship, baja-nene, imattau

    • chevron_right

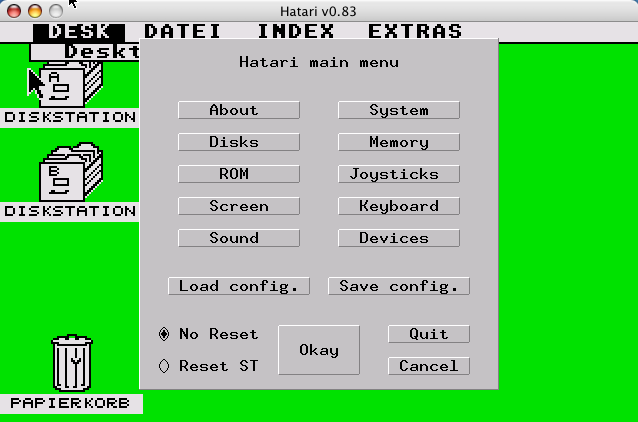
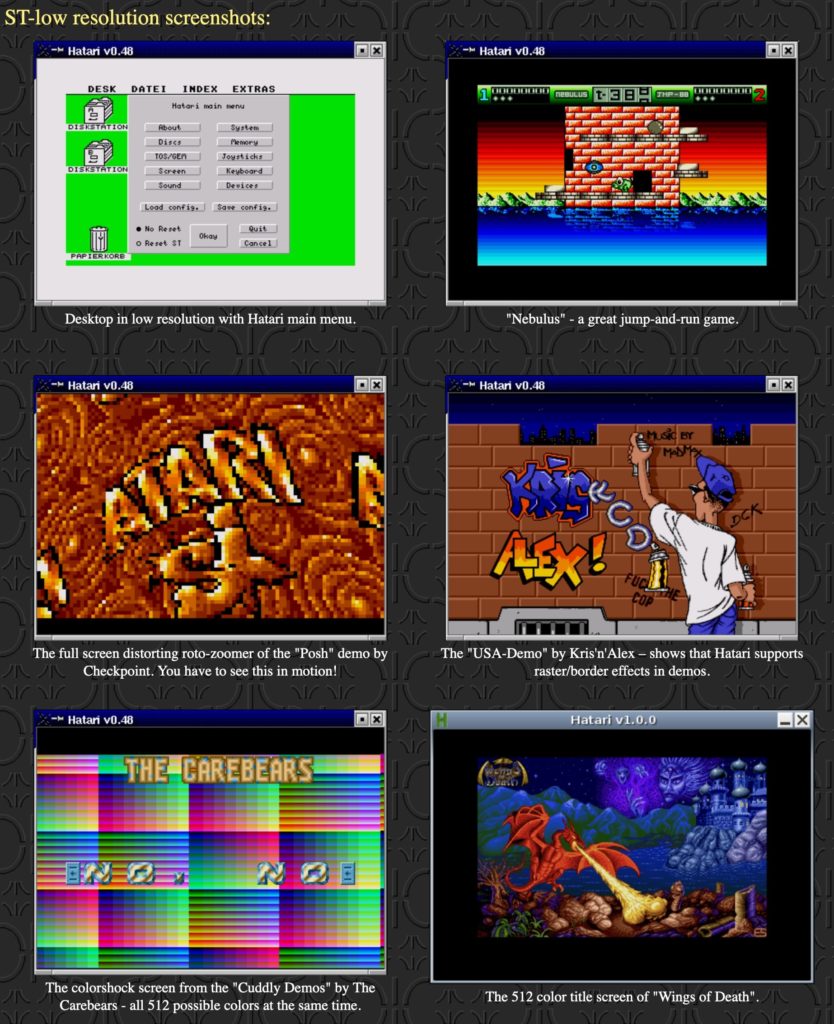
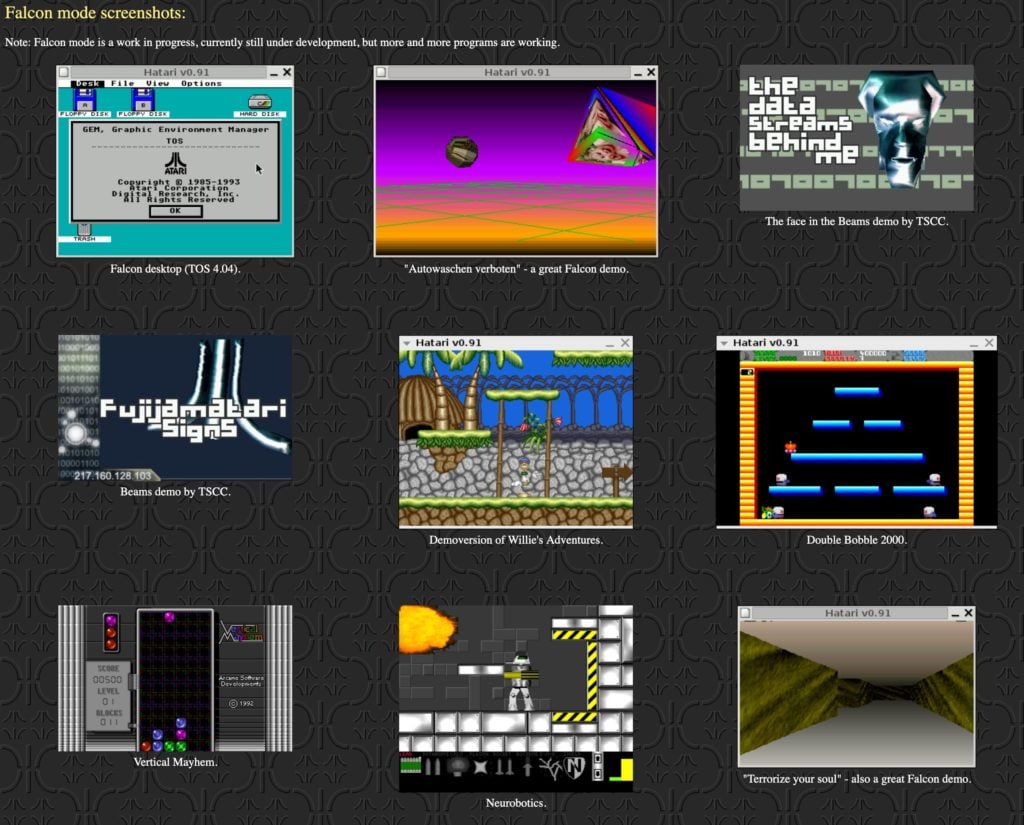
      Hatari – L’émulateur Atari ST / STE / TT / Falcon

      Korben · news.movim.eu / Korben · Saturday, 13 February, 2021 - 08:00 · 2 minutes

    Ça vous dirait de renouer avec les sensations que vous éprouviez à l’époque face à votre Atari ?

    Bonne nouvelle, c’est possible simplement grâce à Hatari, un émulateur Atari ST / STE / TT / Falcon qui tourne aussi bien sous Windows que Linux ou macOS.

    Il faut savoir que la plupart des émulateurs Atari sont pensés pour exécuter de la meilleure façon possible les applicatifs Atari GEM alors que Hatari est plutôt conçu pour émuler le plus fidèlement possible le matériel d’un Atari ST. Ainsi, au-delà des applicatifs GEM, il est possible de faire tourner « également de vieux jeux et des démos conçues pour ST / STE.

    Hatari est donc capable d’émuler le matériel d’extension d’époque comme la puce vidéo Videl ou la DSP 56001 qui permettait notamment sur le Falcon de bénéficier d’une meilleure résolution. Hatari sait aussi émuler un joystick pour vos jeux d’époques.

    Pour faire tourner Hatari, il vous faudra une image TOS (l’OS Atari 16 / 32 bits). Vous pouvez l’extraire vous-même de votre Atari d’époque, en récupérer une sur le net , ou utiliser EmuTOS qui remplace le TOS.

    Amusez-vous bien ! Merci à Laurent pour le partage.


    NordVPN à moins de 3€/mois

    blog

    -68% 3,3€/mois durant 2 ans

    Protection en un clic, fonctionnalité Kill Switch, masquage de votre adresse IP, prise en charge des partages de fichiers en p2p, protection contre les malwares et les pubs, streaming sans interruption, test de fuite DNS et même possibilité de coupler l’outil avec l’anonymat de The Onion Router … sont quelques-unes des autres options disponibles.

    NordVPN a tissé une toile de serveurs dans le monde entier (plus de 5 500 dans 60 pays) permettant ainsi de se localiser dans la zone géographique de son choix. Vous avez envie d’un Anime japonais ou bien d’une exclusivité US ? Aucun problème. À vrai dire, vous pouvez même vous localiser en France en cas de déplacement à l’étranger.

    En complément de cet impressionnant réseau, NordVPN a aussi développé la fonctionnalité SmartPlay qui permet d’accéder en toute sécurité aux contenus qui sont normalement inaccessibles. C’est un système de SmartDNS performant qui ne nécessite pas d’intervention complexe, vous profitez d’une connexion sécurisée et vous visionnez le contenu de votre choix en streaming sans vous prendre la tête.

    Profiter de la promo

    KorbensBlog-UpgradeYourMind?d=yIl2AUoC8zAKorbensBlog-UpgradeYourMind?i=_5xNPsYeDKc:OKG8DiUtscE:D7DqB2pKExkKorbensBlog-UpgradeYourMind?i=_5xNPsYeDKc:OKG8DiUtscE:GG6oivYVkFsKorbensBlog-UpgradeYourMind?d=qj6IDK7rITsKorbensBlog-UpgradeYourMind?i=_5xNPsYeDKc:OKG8DiUtscE:gIN9vFwOqvQKorbensBlog-UpgradeYourMind?d=7Q72WNTAKBA
    • chevron_right

      Rescuezilla – Cloner et restaurer un disque dur simplement

      Korben · news.movim.eu / Korben · Friday, 12 February, 2021 - 08:00 · 1 minute

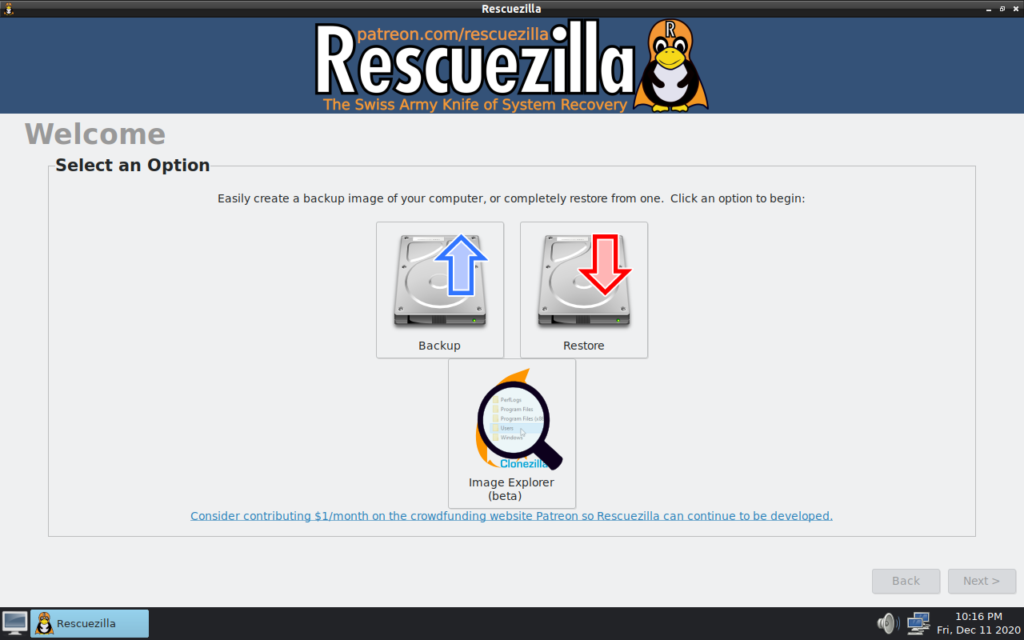
    Il existe beaucoup de logiciels pour sauvegarder un disque dur en le clonant, mais connaissez-vous Rescuezilla ?

    Totalement compatible avec Clonezilla, ce logiciel se présente sous la forme d’un CD ou d’une clé USB bootable, qui vous permet au travers d’une interface graphique de sauvegarder ou restaurer vos machines Windows, Mac ou Linux.

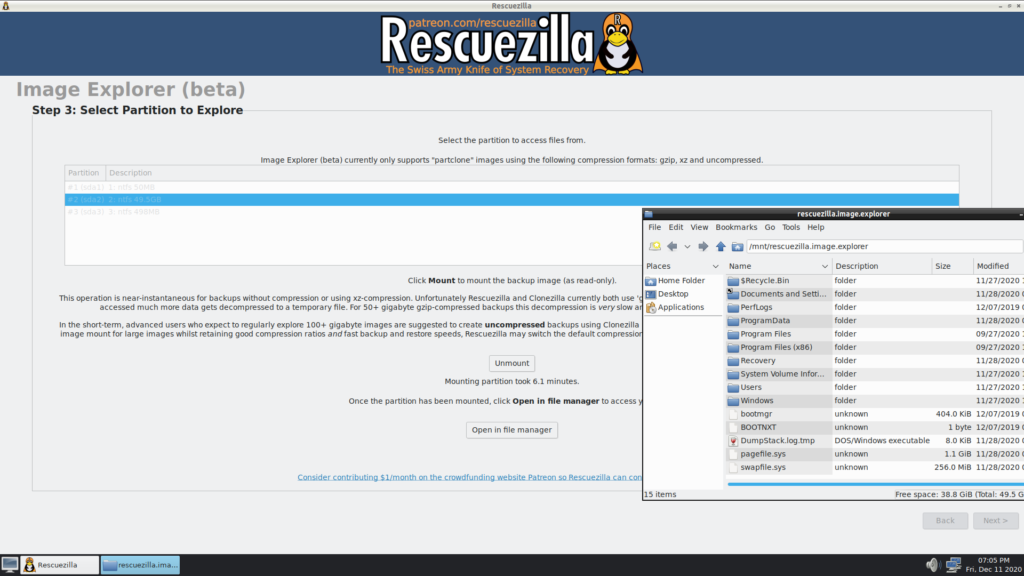
    Comme je le disais, l’image réalisée est compatible avec Clonezilla donc vous pouvez aussi restaurer des images réalisées initialement avec Clonezilla. L’outil offre également une fonctionnalité de montage de vos images pour parcourir les fichiers sans devoir tout restaurer, mais également une fonctionnalité de restauration de fichiers effacés.

    Cerise sur le gâteau, vous pouvez également utiliser Rescuezilla comme un moyen d’avoir un accès rapide à Internet puisque celui-ci embarque un navigateur. Pratique pour récupérer un driver ou une documentation technique quand on est sur un ordinateur dont le disque dur est HS.

    Rescuezilla est disponible ici et les sources sont là .

    Merci à Lorenper pour l’info.


    Le vigile de votre serveur qui recale les mauvaises adresses IP

    Envie de savoir ce qui transite via votre adresse ip ?

    la cybersécurité n’est pas uniquement une problématique de moyens financiers. C’est également une question d’outils défensifs, de périmètre technique, d’accès non filtrés et surtout de course après le temps.

    Il faut donc être capable d’analyser en temps réel ces accès non filtrés, de détecter ceux qui seraient frauduleux

    CrowdSec est un outil 100% open source qui combine 2 idées très connues des administrateurs de serveurs.

    Crowdsec est capable de bannir automatiquement une IP se connectant sur votre serveur, un peu à la manière d’un Fail2banEt il est capable de proposer une base de données de ces IPs à la communauté des utilisateurs CrowdSec, un peu comme le fait AbuseIPDB, afin de faire circuler l’info rapidement et que chacun puisse être protégé à son tour.

    Cela vous permet de détecter tous les types d’attaques et d’y répondre de manière proportionnée

    En Savoir + sur Crowdsec et le tester

    KorbensBlog-UpgradeYourMind?d=yIl2AUoC8zAKorbensBlog-UpgradeYourMind?i=3VF-rp9fY0o:6M-xCu-j4bs:D7DqB2pKExkKorbensBlog-UpgradeYourMind?i=3VF-rp9fY0o:6M-xCu-j4bs:GG6oivYVkFsKorbensBlog-UpgradeYourMind?d=qj6IDK7rITsKorbensBlog-UpgradeYourMind?i=3VF-rp9fY0o:6M-xCu-j4bs:gIN9vFwOqvQKorbensBlog-UpgradeYourMind?d=7Q72WNTAKBA
    • chevron_right

      Raspberry Pi OS added a Microsoft repo. No, it’s not an evil secret

      Jim Salter · news.movim.eu / ArsTechnica · Monday, 8 February, 2021 - 18:42 · 1 minute

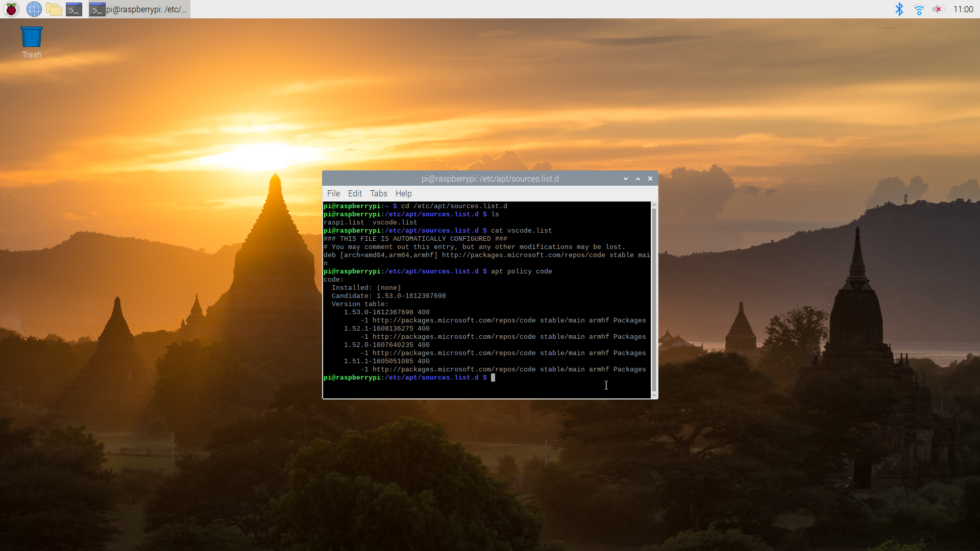
    We were recently alerted to something of a tempest in a teapot: when the Raspberry Pi Foundation made it easier to install Microsoft's Visual Studio Code development environment, some Linux users mistook it for a sort of Mark of the Beast, with concerns being raised about telemetry and "what Microsoft repo secretly installed without your knowledge."

    It's true that an update recently pushed to Raspberry Pi OS added a Microsoft repo to Raspberry Pi OS systems—but it's not true that it added any actual packages whatsoever.

    Investigating the changes

    Luckily, my own Raspberry Pi 400 was running Ubuntu, not Raspberry Pi OS, which made it easy to switch back and see what changes occurred in the system. Equally luckily, the Raspberry Pi 400 is almost ideally suited to distro-hopping—all I needed to do to get a pre-update version of Pi OS running was to power my Pi off, swap SD cards from the Ubuntu card I had been using to my old Pi OS card, and then fire it back up. Presto, a pre-update Pi!

    Read 16 remaining paragraphs | Comments

    index?i=GHnW8ol3M6g:faBvmqvO648:V_sGLiPBpWUindex?i=GHnW8ol3M6g:faBvmqvO648:F7zBnMyn0Loindex?d=qj6IDK7rITsindex?d=yIl2AUoC8zA
    • chevron_right

      Ubuntu ne démarre plus ? Comment réparer le problème.

      Korben · news.movim.eu / Korben · Saturday, 6 February, 2021 - 08:00 · 2 minutes

    Si vous êtes sous Ubuntu, il vous est forcément arrivé une petite galère à un moment d’ordinateur qui ne veut plus démarrer. La faute d’une mise à jour qui savate GRUB ou d’une install multi-boot Windows qui foire le MBR…etc.

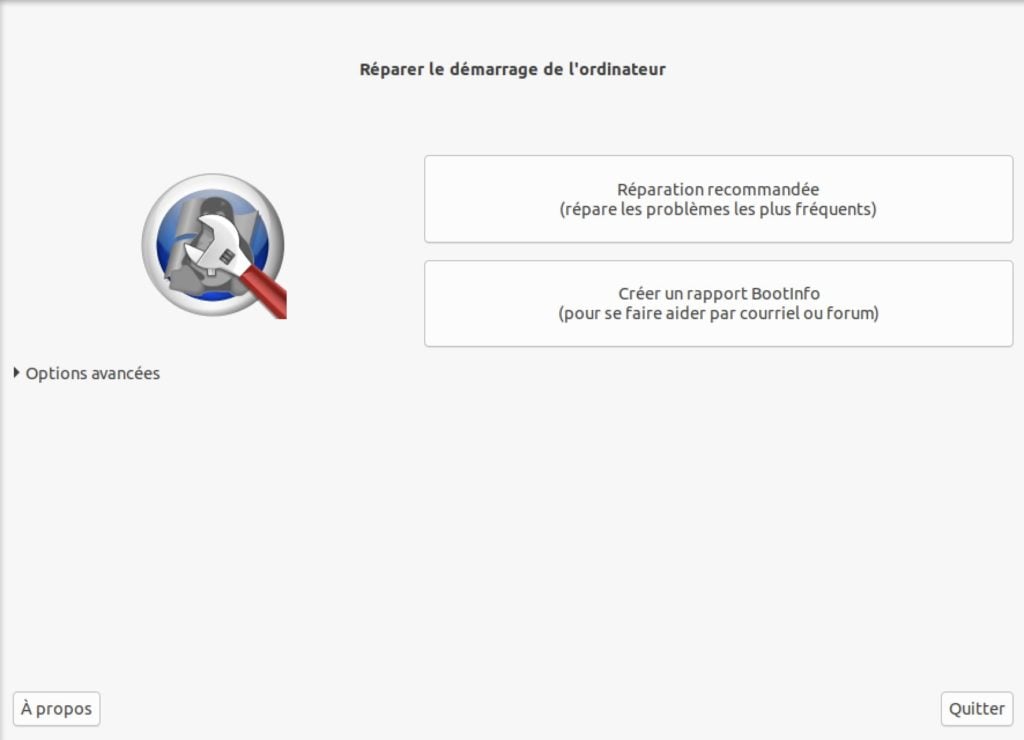
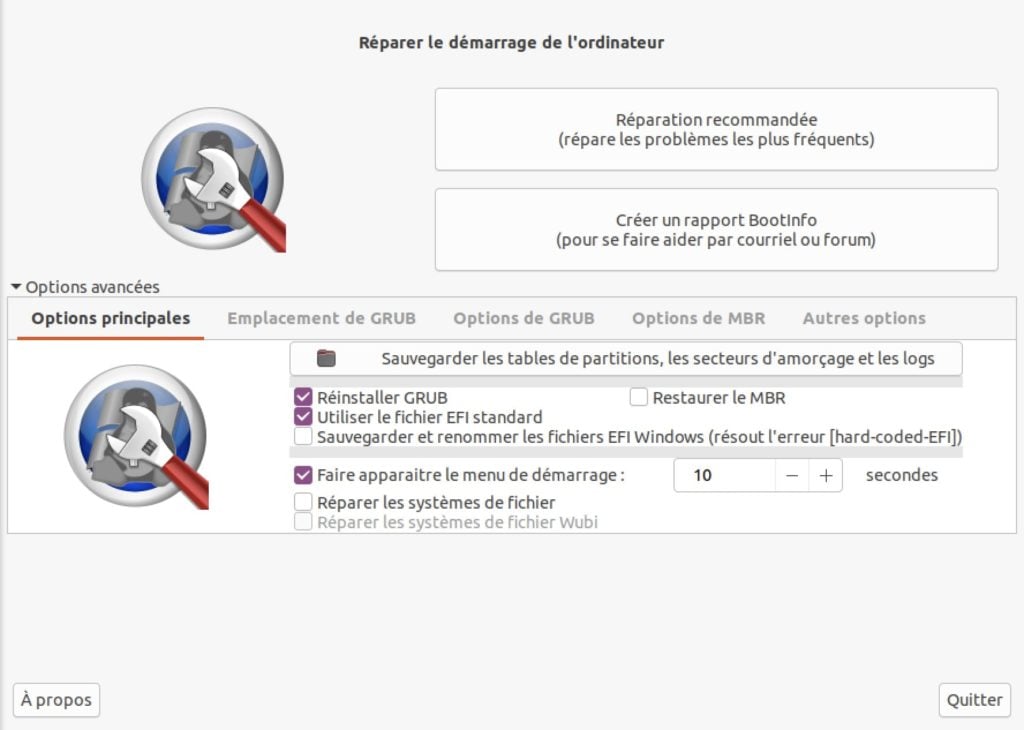
    Je sais, ça vous a fait transpirer à grosses gouttes, mais ce temps est révolu, car la prochaine fois, vous vous sortirez seul de la galère à l’aide de l’utilitaire Boot Repair .

    Boot Repair est capable de corriger automatiquement la plupart des soucis de démarrage rencontré notamment sous Ubuntu, mais aussi de générer un rapport d’analyse pour savoir ce qui cloche avec votre démarrage.

    Boot Repair est disponible sous la forme d’un disque bootable ici, mais vous pouvez aussi l’installer sur votre Live CD (ou Live USB) Ubuntu à l’aide de la commande suivante :

    sudo add-apt-repository -y ppa:yannubuntu/boot-repair && sudo apt update && sudo apt install -y boot-repair ; boot-repair

    Boot Repair propose également des options avancées pour ceux qui maîtrisent bien leur sujet et qui vous permettront de :

    • Réinstaller Grub
    • Utiliser le fichier EFI standard
    • Sauvegarder et renommer l’EFI Windows (erreur hard-coded-EFI)
    • De réactiver le menu de démarrage si celui-ci a disparu ou de prolonger son temps d’affichage
    • Réparer le système de fichiers
    • De relocaliser GRUB
    • Agir sur les nombreuses options de GRUB
    • De restaurer le MBR pour tout ce qui est boot Legacy (non EFI)
    • De réparer certains systèmes Windows

    L’outil est également utilisable en ligne de commande pour ceux qui veulent l’utiliser via des scripts ou autre.

    Bonne réparation à vous !


    Le vigile de votre serveur qui recale les mauvaises adresses IP

    Envie de savoir ce qui transite via votre adresse ip ?

    la cybersécurité n’est pas uniquement une problématique de moyens financiers. C’est également une question d’outils défensifs, de périmètre technique, d’accès non filtrés et surtout de course après le temps.

    Il faut donc être capable d’analyser en temps réel ces accès non filtrés, de détecter ceux qui seraient frauduleux

    CrowdSec est un outil 100% open source qui combine 2 idées très connues des administrateurs de serveurs.

    Crowdsec est capable de bannir automatiquement une IP se connectant sur votre serveur, un peu à la manière d’un Fail2banEt il est capable de proposer une base de données de ces IPs à la communauté des utilisateurs CrowdSec, un peu comme le fait AbuseIPDB, afin de faire circuler l’info rapidement et que chacun puisse être protégé à son tour.

    Cela vous permet de détecter tous les types d’attaques et d’y répondre de manière proportionnée

    En Savoir + sur Crowdsec et le tester


    KorbensBlog-UpgradeYourMind?d=yIl2AUoC8zAKorbensBlog-UpgradeYourMind?i=FS_dGs-05Bg:ZpWcPhoDmtA:D7DqB2pKExkKorbensBlog-UpgradeYourMind?i=FS_dGs-05Bg:ZpWcPhoDmtA:GG6oivYVkFsKorbensBlog-UpgradeYourMind?d=qj6IDK7rITsKorbensBlog-UpgradeYourMind?i=FS_dGs-05Bg:ZpWcPhoDmtA:gIN9vFwOqvQKorbensBlog-UpgradeYourMind?d=7Q72WNTAKBA
    • chevron_right

      Ubuntu Core 20 adds secure boot with hardware-backed encryption

      Jim Salter · news.movim.eu / ArsTechnica · Tuesday, 2 February, 2021 - 22:26

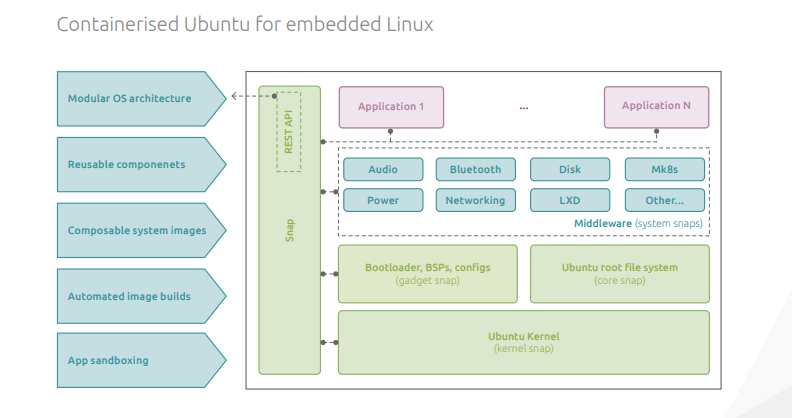
    You might draw a fairly similar schematic diagram to give someone a simplified idea of how a traditional Linux distribution is put together—but it wouldn

    Enlarge / You might draw a fairly similar schematic diagram to give someone a simplified idea of how a traditional Linux distribution is put together—but it wouldn't be as close to literal accuracy as this Ubuntu Core diagram is. (credit: Canonical )

    Canonical released Ubuntu Core 20 today, which is now available for download. If you're already familiar with Ubuntu Core 20, the standout new feature is added device security with secure boot, full-disk encryption, and secure device recovery baked in. If you're not familiar with Ubuntu Core yet... read on!

    The key difference between regular Ubuntu and Ubuntu Core is the underlying architecture of the system. Traditional Linux distributions rely mostly on traditional package systems— deb , in Ubuntu's case—while Ubuntu Core relies almost entirely on Canonical's relatively new snap package format.

    Ubuntu Core also gets a full 10 years of support from Canonical, rather than the five years traditional Ubuntu LTS releases get. But it's a bit more difficult to get started with, since you need an Ubuntu SSO account to even log into a new Ubuntu Core installation in the first place.

    Read 40 remaining paragraphs | Comments

    index?i=9bqCHc4ZNho:G5f65f74MTc:V_sGLiPBpWUindex?i=9bqCHc4ZNho:G5f65f74MTc:F7zBnMyn0Loindex?d=qj6IDK7rITsindex?d=yIl2AUoC8zA
    • chevron_right

      A Practical Guide To Grub Repair On Ubuntu (And Probably Linux Mint)

      news.movim.eu / gadgeteerza-tech-blog · Sunday, 31 January, 2021 - 11:11

    I must say I have messed up my Grub twice on Manjaro Linux and have learnt to just take a deep breath, go grab some coffee, and get on with figuring out the repair. I've never lost any data and both times it was my own stupidity, and usually related to writing a Grub change to /dev/sda where actually my boot drive is /dev/sdb and that is where my Grub is supposed to write to.

    So if you still panic (or have never had a Grub issue and don't know what panic is) then this is a good guide to read through and keep for that future event.

    See https://www.addictivetips.com/ubuntu-linux-tips/ubuntu-grub-repair-guide/

    #technology #linux #tips #opensource #grub